
S. HAYASHI
Thank you to my dear friend for accepting to write an other interesting post in my foodie section. As usual I am always amazed by what she is able to do in her kitchen. Read below....

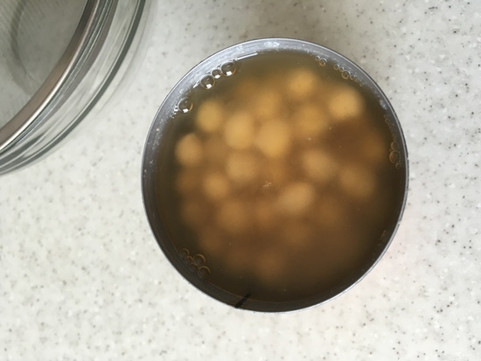
Aqua-What ?
Do you know about aquafaba? It’s the leftover liquid from a can of chickpeas that you can use in baking. Yes—that stuff that looks like dirty water is actually a baking ingredient!! I love using aquafaba because it makes use of something that is essentially food waste.

Mom taught me
I learned to bake from my mom and she was fond of telling me how her aunt would use her thumb to clean out the inside of an eggshell to make sure she used every last drop of the egg. When you live through the Depression, you learn not to waste anything! My mom could also scrape a bowl clean and as a result, that’s the only way I know how to bake. Using aquafaba makes me feel like I am contributing to reducing food waste in some very small way.
Did you know ? Canadians are throwing out more food than they realize – food that could, at one point, have been eaten! - lovefoodhatewaste.ca
Aquafaba can be used as a replacement for egg whites or eggs in recipes. Who came up with this brilliant idea? This website delves into the history of how it came to be used as a baking ingredient.
Favourite soups
I was making one of our favourite soups—chickpea, wild rice, and kale— and found myself with the leftover aquafaba, which lead me to look for a recipe to use it in. Once you start baking with aquafaba you will never want to drain chickpeas down the sink again.

Draining
If you’re going to save the aquafaba, use a fine sieve when draining the can to ensure there are no pieces in the liquid. Chickpea cookies are actually a thing (and they are delicious) but in general, keep the chickpeas out of the aquafaba.


Aquafaba can be kept in the fridge for a few days, or pre-portioned and frozen for later use.
Aquafaba in the past
I have used aquafaba in the past to make vegan meringues (with great results!) but recently I tried it in this recipe for Almond Butter Chocolate Chip Cookies, where the aquafaba is used as an egg replacer. The bonus to these cookies is that they are gluten-free but you don’t have to fuss with a lot of different GF flours. They are also vegan as the aquafaba takes the place of the egg.
If you are looking to have your mind blown, give these cookies a try to experience firsthand how food waste can turn into something delicious!
ALMOND BUTTER CHOCOLATE CHIP COOKIES (gluten-free and vegan)
Ingredients
- 1/4 cup coconut oil (soft or melted)
- 1/3 cup coconut or organic cane sugar (you can use granulated or brown sugar but be aware that they are not vegan)
- 2 Tbsp almond butter (or substitute another natural nut butter)
- 3 Tbsp aquafaba
- pinch of sea salt
- 1 tsp baking powder
- 1 1/3 cup almond flour (or blanched almonds, finely ground in a food processor and then measured)
- 1/2 cup desiccated coconut (unsweetened is best)
- 3/4 cup vegan dark chocolate chips (I used the Enjoy Life brand mini chips)

Instruction - To a large mixing bowl, add coconut oil, coconut (or cane) sugar, almond butter, aquafaba, salt, and stir/whisk to combine.
- In a smaller bowl, mix almond flour with baking powder. Add in coconut and mix again. Add this mixture to the wet ingredients. It won’t be so thick that you can’t continue mixing it, but it should appear “doughy.”
- Stir in chocolate chips, cover, and refrigerate overnight or for at least 30 minutes.
- Preheat oven to 350 degrees F (176 C).
- Once chilled, scoop out rounded Tablespoon amounts of dough (I used a cookie scoop) and place them 2 inches apart on a parchment-lined baking sheet. You can press down slightly to flatten the cookies but I kept them rounded because I like the look.

Baking
- Bake for 12-16 minutes or until the edges are just slightly golden brown and the tops appear dry. NOTE: baking times vary depending on your oven so look for a little colour around the edges to tell you when they are done.
- Remove from oven and let rest on the pan for 5 minutes.
- Then transfer to a cooling rack.
- Store leftovers in an airtight container at room temperature up to 3 days or in the freezer up to 1 month.

ET VOILÀ !!! Thank you for this delicious recipe. I hope you will try it and enjoy it.
“Respect for food is a respect for life, for who we are and what we do” - Thomas Keller -
Comments